Unique Summer Nail Design
Today we are creating a very fun nail set, and things are going to get a little interesting because we’re doing eyelet nails.
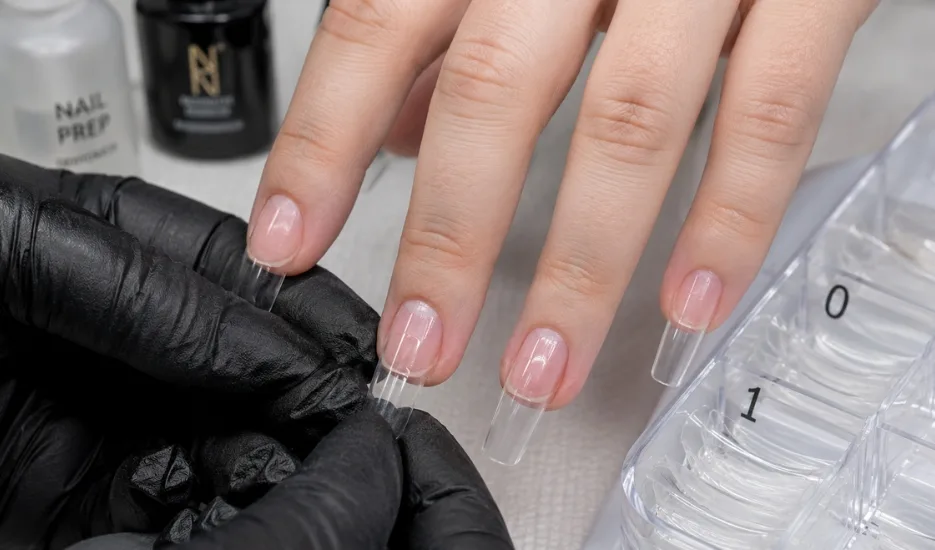
Choosing The Right Gel Extensions
For today’s nail set, we’re going to be doing a lot of drilling into the nail tips, so using a strong base is important.
We’re using gel extensions and sizing them from sidewall to sidewall, making sure the fit is comfortable.
You don’t want the nail tip to feel too snug, but you also don’t want it hanging over the skin.
If you’re between two sizes, choose the larger size and shape it down rather than trying to squeeze into a smaller size.
Preparing The Nail Tips For Better Adhesion
Before applying the nail tips, prep the inside using acetone and a cleanup brush.
Scrub and stipple the acetone into the inner part of the nail tip.
This helps remove the smooth surface and creates a rough texture for better grip.
If the inside of the nail tip is too smooth, it can potentially lead to lifting. Creating friction gives the gel something secure to hold onto.
Applying The Gel Extensions
Once the nail tips are prepped, apply builder gel to the inside of the nail tip.
Place the nail tip from the cuticle area all the way to the tip of the nail.
Once everything is straight and in place, cure underneath a UV lamp for about 30 seconds.
Repeat the process until all nail tips are applied.
After application, trim the nails down using tip cutters and match all five nails to the same length.
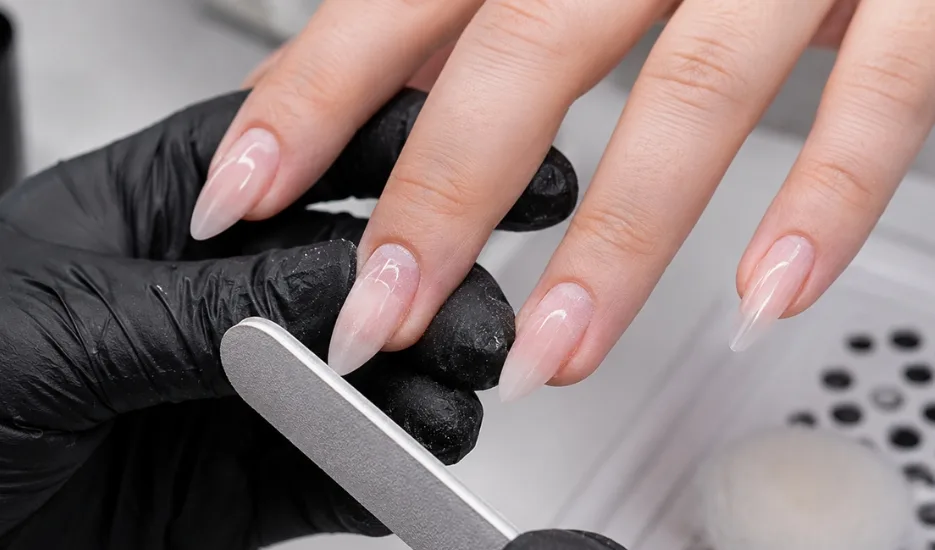
Creating The Almond Shape
- Using straight-edge nail clippers, clip the sides to create an almond shape.
- These nails are slightly sharper than a traditional almond and lean closer to a stiletto shape while remaining softly rounded.
- At this stage, focus on creating the rough shape before refining everything with filing.
Perfecting The Shape And Cuticle Area
Use a ceramic drill bit around the cuticle area. Work gently and apply very light pressure.
The goal is to blend the cuticle area and create a seamless transition from the natural nail to the extension.
While working around the cuticle area, smooth out the apex and create a natural curve from the cuticle to the tip.
Next, use a nail file to perfect the almond shape.
Finish with a mini buffer to remove shine and soften any sharp edges.
Preparing For Nail Art
Before starting the design, use acetone around the cuticle area.
This helps create a smoother blend between the cuticle area and the gel polish.
A seamless transition makes the finished nails look cleaner and more professional.
Creating The Base Color
- Start by wiping away any dust using alcohol.
- Apply a nude gel polish to all five nails.
- Use two to three coats to achieve full opacity and create a clean foundation for the design.
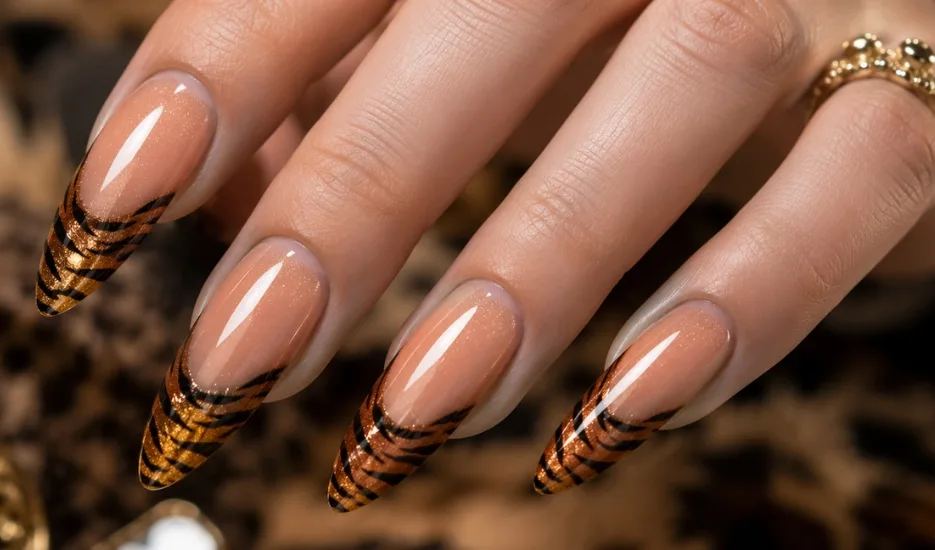
French Tips And Animal Print Details
The index and middle fingers feature black French tips.
Keep the smile line fairly low to match the overall design.
For the thumbnail and ring finger, use an orange-toned cream color as the French tip base.
Layer dark brown along the outer edges and a lighter cream shade through the center.
This creates depth and dimension before adding the tiger print details.
Apply a thin layer of cat-eye gel to enhance the design and add a subtle sparkle effect.
Finish with black tiger stripes to complete the animal print look.
Designing The Abstract Pinky Nail
The pinky nail combines blooming gel and marbling.
Apply blooming gel to the French tip area and layer red and white gel polish to create a flower-like effect.
Add pink and white marbling toward the tip of the nail.
Complete the design with abstract lines and dots for a unique artistic finish.
This nail creates a vintage-inspired look with bold and creative details.
Creating The 3D Flowers
For the floral details, mix sculpting clay colors to achieve the desired shades.
Roll the clay into a tube and cut small sections to create petals.
Shape each petal individually and create movement with soft frills and curves.
Once positioned, cure them in place using a portable UV lamp.
Add color detailing to the center of the petals using pink, purple, and yellow gel polish.
The Eyelet Nail Technique
Now comes the most exciting part of the design.
Use circular metal pieces and secure them with rhinestone glue.
Before creating the eyelets, make sure there is enough space on the nail for the placement.
Once cured, use a cuticle bit to carefully drill a hole through the center of each metal ring.
Work slowly and follow the border created by the metal piece.
Because the rings are durable, they help guide the drilling process.
This creates the signature eyelet nail effect that makes this design stand out.

Finishing The Nail Set
- Apply a final layer of top coat to all five nails.
- Seal in the design and add shine.
- Finish with cuticle oil to nourish the nails and complete the manicure.
The finished look combines eyelet details, tiger print French tips, abstract artwork, and 3D flowers into one creative nail set.
Why Eyelet Nails Stand Out
Eyelet nails bring together alternative style and seasonal nail art.
While often associated with grunge, goth, or alternative aesthetics, this design also works beautifully with spring and summer nail sets.
The combination of eyelets, flowers, animal print, and abstract details creates a unique look that feels creative, stylish, and completely different from traditional nail designs.
6 Trendy Tropical Summer Fruit Nails You’ll Love This Season