
Perfect Gel X Nails at Home
Here is a step-by-step guide on how to do your Gel X nails at home, going through preparation, application, and this Christmas design.
It’s so fun and easy to recreate, even if you’re a beginner, because you don’t need a nail drill for this. I promise they will last just as long.
Prepare Your Natural Nails
Here’s everything we need to prepare our nails to become the best base for Gel X nails.
It is very important to have strong and healthy nails to begin with.
Gently file down your nails however you prefer. Just keep in mind that the longer you keep them, the more product you will need later on.
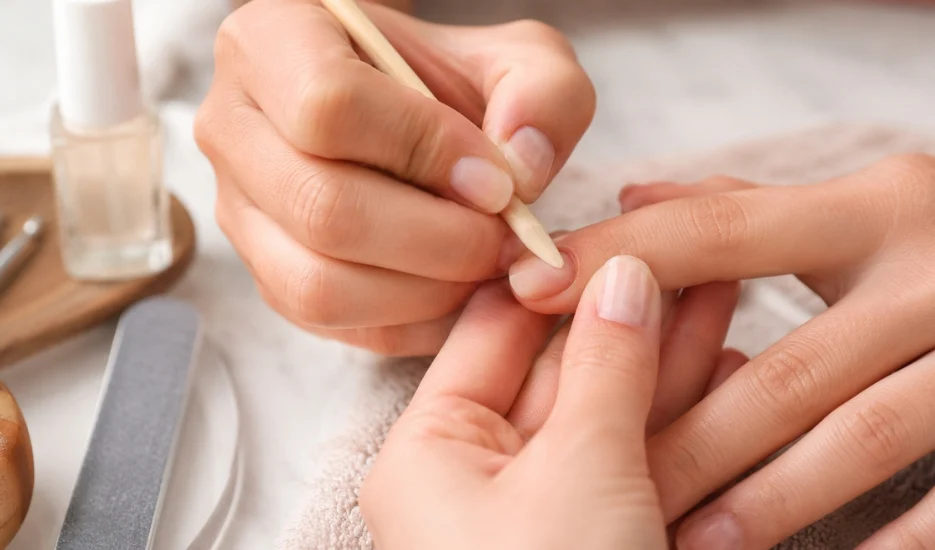
Now it’s time to push down your cuticles.
It’s important to be gentle and use a cuticle gel to soften them first. When you push them back, it should happen effortlessly without causing any damage.
Also cut anything that sticks out without pulling or hurting yourself. Please be very careful and gentle here.
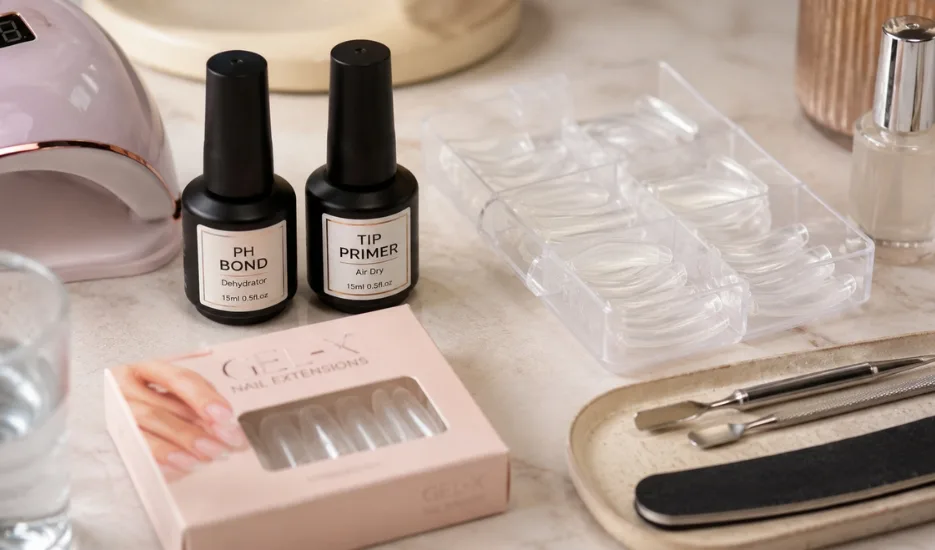
Choose And Prep Your Gel X Nail Tips
Now it’s time to pick and measure the Gel X nail tips.
Here I’m using medium square tips. These are very beginner-friendly and fit perfectly without needing to file them down afterward.
After choosing your nail tips, you can file down the inside for better grip and long-lasting nails.
If you don’t have a nail drill, you can achieve the same long-lasting result with a tip primer.
The consistency is very liquid, so carefully brush it on until it becomes tacky. That’s when you know it has the perfect grip for long-lasting nails.
It works just as well and can last up to 5 weeks.
Create The Perfect Base
Back to preparing the natural nails.
Start with a pH bond, which acts as a dehydrator to remove any oils left on the nail.
Follow with the same tip primer used for the nail tips.
This creates grip for the natural nail as well, so there is no need to file down and damage your natural nails.
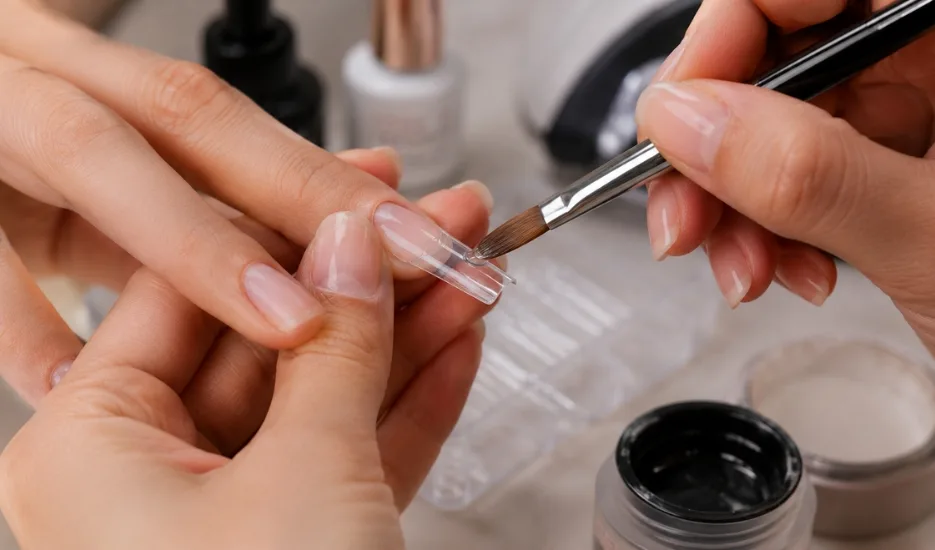
Apply The Gel X Nail Tips
The application may look scary in the beginning, but after a few tries, you’ll master it.
Be patient and enjoy the process.
Just think about how many compliments you’ll get and how proud you’ll feel knowing you did your own nails.
First, make sure the nail tip is covered with a layer of gel.
Apply more gel on the cuticle side of the tip and slowly press it down a few millimeters away from your cuticles.
Continue pressing until you see the gel spread all the way up and cover the entire nail.
That’s when you know you can flash cure.
Keeping a small gap between the cuticle and the Gel X nail tip is important because it helps prevent lifting later.
Blend The Nail Tips
You can smooth out the tips using a nail drill or simply a nail file.
The most important thing at this stage is making sure your natural nail and the Gel X nail tip become one seamless surface.
Seal The Cuticle Area
Apply a base coat.
Concentrate on the gap between the cuticle and the Gel X nail tip.
Create a flawless and smooth base.
This not only makes everything look natural but also helps prevent lifting.
Create The Christmas Nail Design
For the design, start with two thin coats of color.
Next, use white and red nail art gel to create the Christmas details.
Take your time and build the design slowly.
Simple nail art details can completely transform the final look and create a cozy holiday feel.
Apply The Top Coat
Use a non-wipe top coat.
This is beginner-friendly because it doesn’t leave a sticky layer after curing.
Once cured, your nails are finished immediately.
Create The Sweater Nail Effect
For the sweater effect, use nail art gel.
Do not cure at this stage.
While the gel is still wet, coat the design with a layer of clear acrylic powder.
Then flash cure.
That’s all it takes to create cozy sweater nails.

Finish With Cuticle Oil
The final step is cuticle oil.
Apply it around the nails to restore and nourish them.
Massage everything in gently.
And here we are—super fun and easy-to-recreate Christmas nails.
This set is beginner-friendly, long-lasting, and perfect for the holiday season.