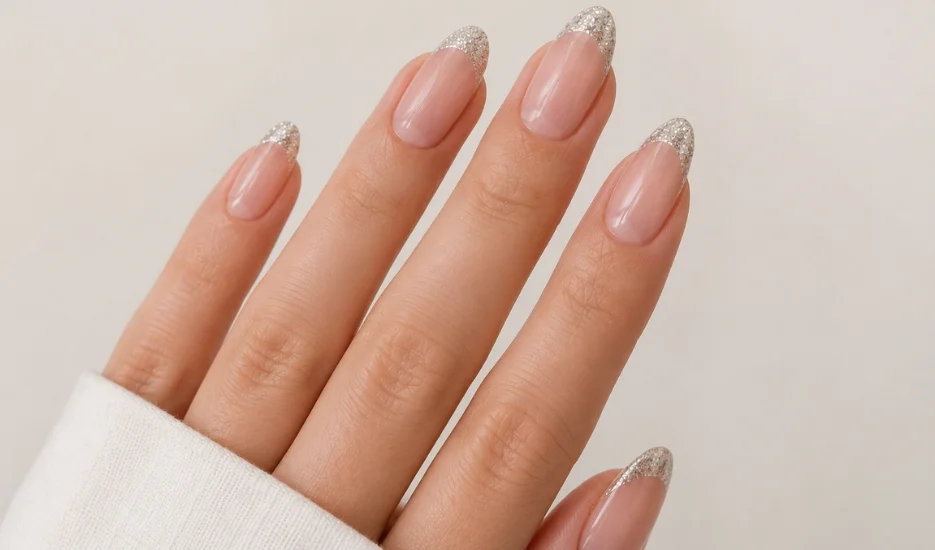
Gel X Glitter French Tip Nails
If You Want salon-style Gel X nails without using a nail drill?
This beginner-friendly tutorial shows how to create beautiful glitter French tip nails at home using simple products and easy techniques.
From nail preparation to application and the final design, this guide covers every step needed for long-lasting and elegant nails.
Why Gel X nails Design Is Perfect 4 Beginners
These New Year-inspired glitter French tip nails are simple, stylish, and can easily be customized with different colors.
Since no drill is required, the process is safer and easier for anyone trying Gel-X nails for the first time.
Step 1: Prepare Your Cuticles
The first step is pushing back the cuticles. Using a cuticle remover gel helps soften everything, making the process gentle and effortless.
Once the cuticles are softened, carefully push them back.
If any excess skin remains, trim it gently using a cuticle cutting tool.
Step 2: Shape the Natural Nails
After cleaning the cuticle area, lightly file the edges of your natural nails.
This helps the Gel-X tips fit more comfortably and creates a cleaner overall application.
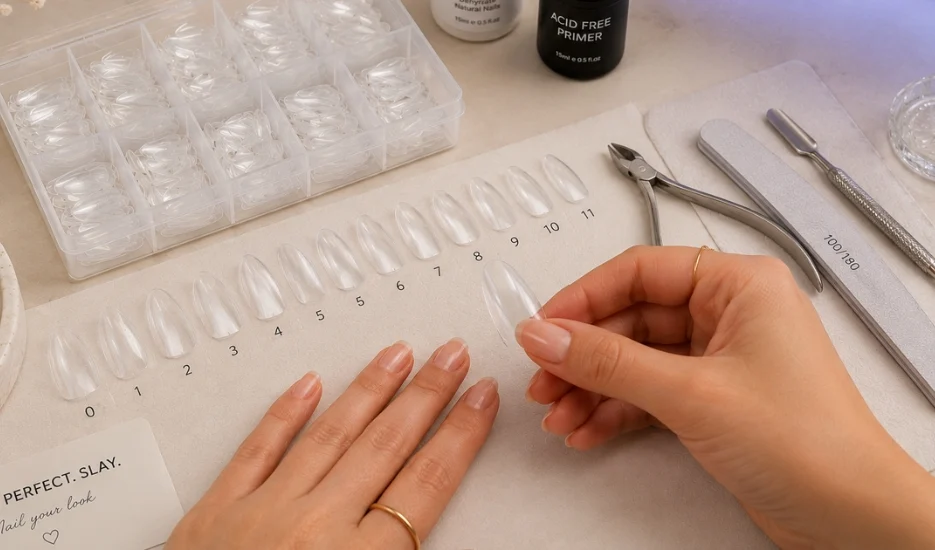
Step 3: Measure and Select Gel-X Tips
For this design, short almond Gel-X tips are used. Choose the correct size for every nail and test the fit before moving forward.
A properly sized tip should fit from sidewall to sidewall without putting pressure on the natural nail.
Step 4: Prepare the Gel-X Tips Without Drill
Since this tutorial doesn’t use a drill, a tip primer is applied inside every nail tip.
Apply a small amount and rub it into the inside surface until it becomes tacky.
This creates the grip needed for long-lasting wear and helps the adhesive bond securely.
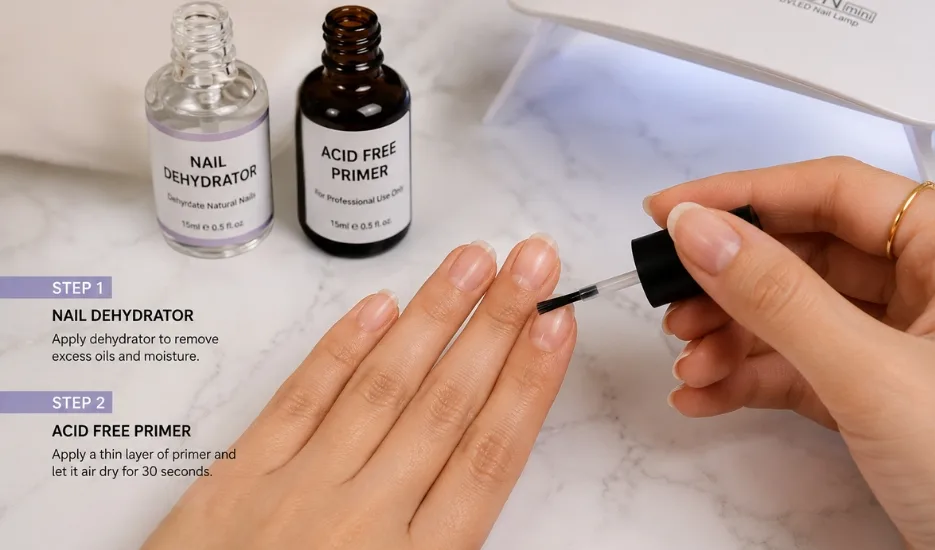
Step 5: Prepare Your Natural Nails
Before applying the tips, use a nail dehydrator to remove oils from the nail surface.
After that, apply the same tip primer used on the nail tips. These two steps help create a strong bond and are important for achieving nails that can last up to five weeks.
Step 6: Apply the Gel-X Tips
Apply soft gel tip adhesive to the inside of the nail tip. Add a little extra adhesive near the cuticle area.
Position the tip slightly away from the cuticle and slowly press downward until the adhesive spreads across the entire nail.
Once everything looks correct, flash cure the nail.
Take your time during this stage. If something doesn’t look right, simply remove the tip and try again before curing.
Step 7: Cure and Refine the Shape
After all tips are attached, cure them completely in a larger lamp.
Next, file around the cuticle area and edges to smooth everything out.
The cleaner your application was earlier, the easier this step becomes.
Step 8: Blend the Cuticle Area
Apply a layer of Base Extend gel, focusing on the gap between the cuticle and the Gel-X tip.
This step helps the tip blend naturally into the nail and reduces the chance of lifting.
Step 9: Apply the Milky White Base Color
For this look, a soft milky white gel polish is applied.
Use two thin coats to create a clean, sheer white finish while maintaining a natural appearance.
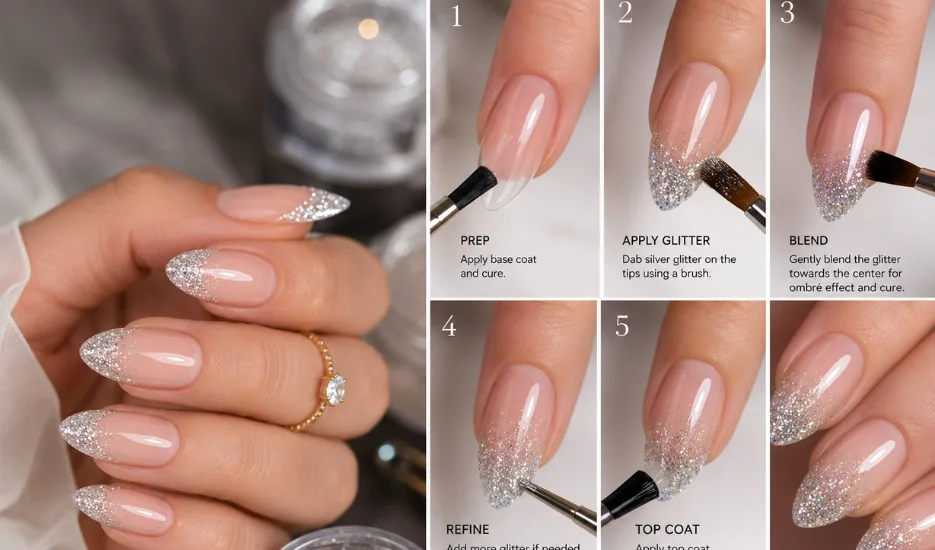
Step 10: Create the Glitter Gradient
Apply glitter polish only to the tips of the nails.
Using a clean brush, gently blend the glitter downward to create a soft ombré effect that transitions smoothly into the milky white base.
Step 11: Draw the French Tips
Using white nail art gel, carefully paint crisp French tip lines over the glitter section.
This creates the signature glitter French manicure look while keeping the design elegant and timeless.
Step 12: Clean and Seal the Design
After finishing the design, wipe the nails with nail cleanser to remove any residue.
Then apply a non-wipe top coat to lock everything in and give the nails a beautiful glossy finish.
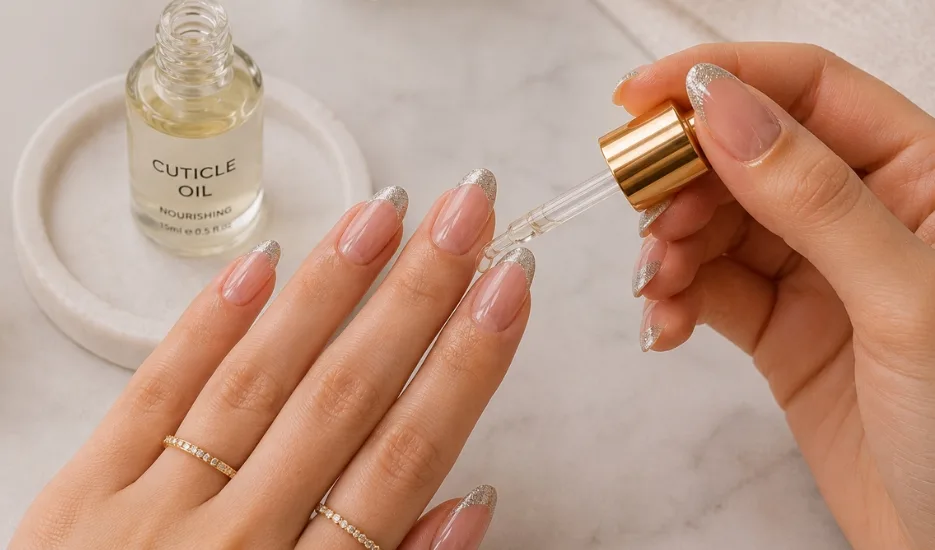
Step 13: Finish with Cuticle Oil
The final step is applying cuticle oil around each nail.
This nourishes the skin, adds shine, and gives the manicure a professional finished look.