
Beach Summer Nails
Summer is the perfect season to experiment with colorful nail designs, and Beach Summer Nails are one of the biggest trends this year.
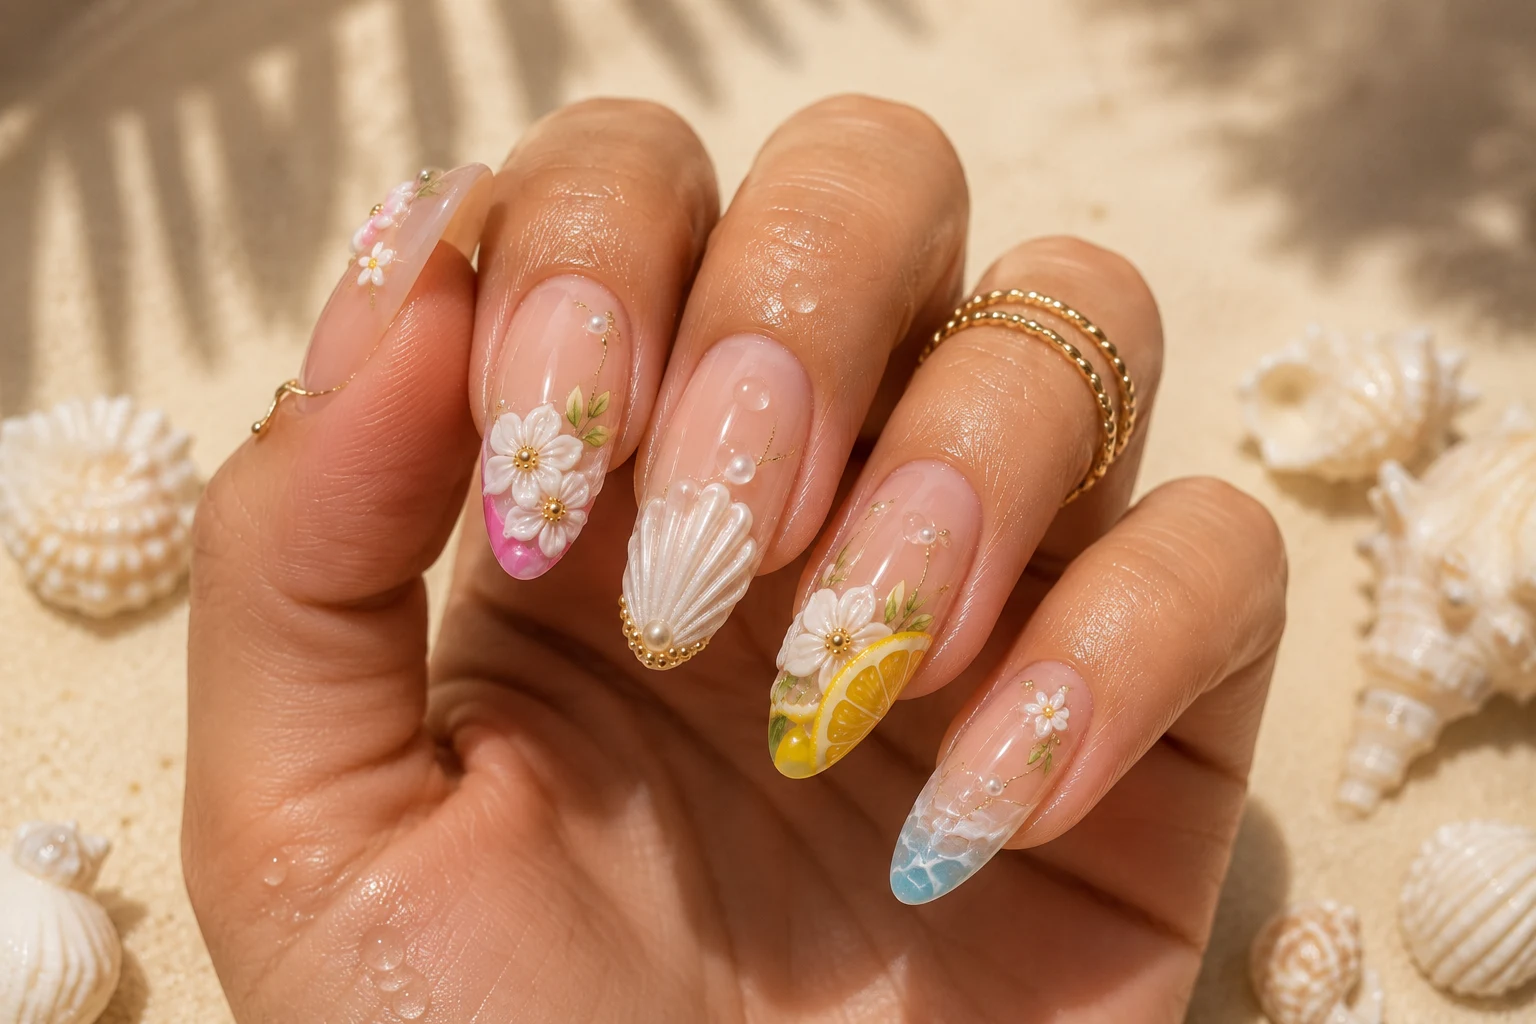
Inspired by sunny beaches, ocean waves, tropical fruits, and vibrant summer colors, this manicure combines playful details with elegant Gel X extensions to create a fresh, eye-catching look.
If you’re looking for a nail design that stands out on vacation, at the beach, or even for everyday summer outfits, this tutorial will guide you through every step.
From preparing your natural nails to creating detailed beach-inspired nail art, you’ll learn how to achieve a salon-quality manicure at home.
Why Gel X Is Perfect for Beach Summer Nails
For this design, Gel X extensions are the ideal choice because they provide the perfect canvas for detailed artwork while remaining lightweight and comfortable to wear.
Unlike traditional extensions, Gel X nails are easier to customize, making them perfect for colorful summer designs with 3D details, French tips, airbrushing, and decorative embellishments.
Step 1: Prepare Your Natural Nails
A beautiful manicure always starts with proper nail preparation.
Begin by applying two thin layers of a peel-off base coat to protect your natural nails.
Many nail artists also apply a small amount of cuticle oil underneath the peel-off base to make removal easier later.
Once your nails are prepped, choose full-cover Gel X tips that fit comfortably from sidewall to sidewall.
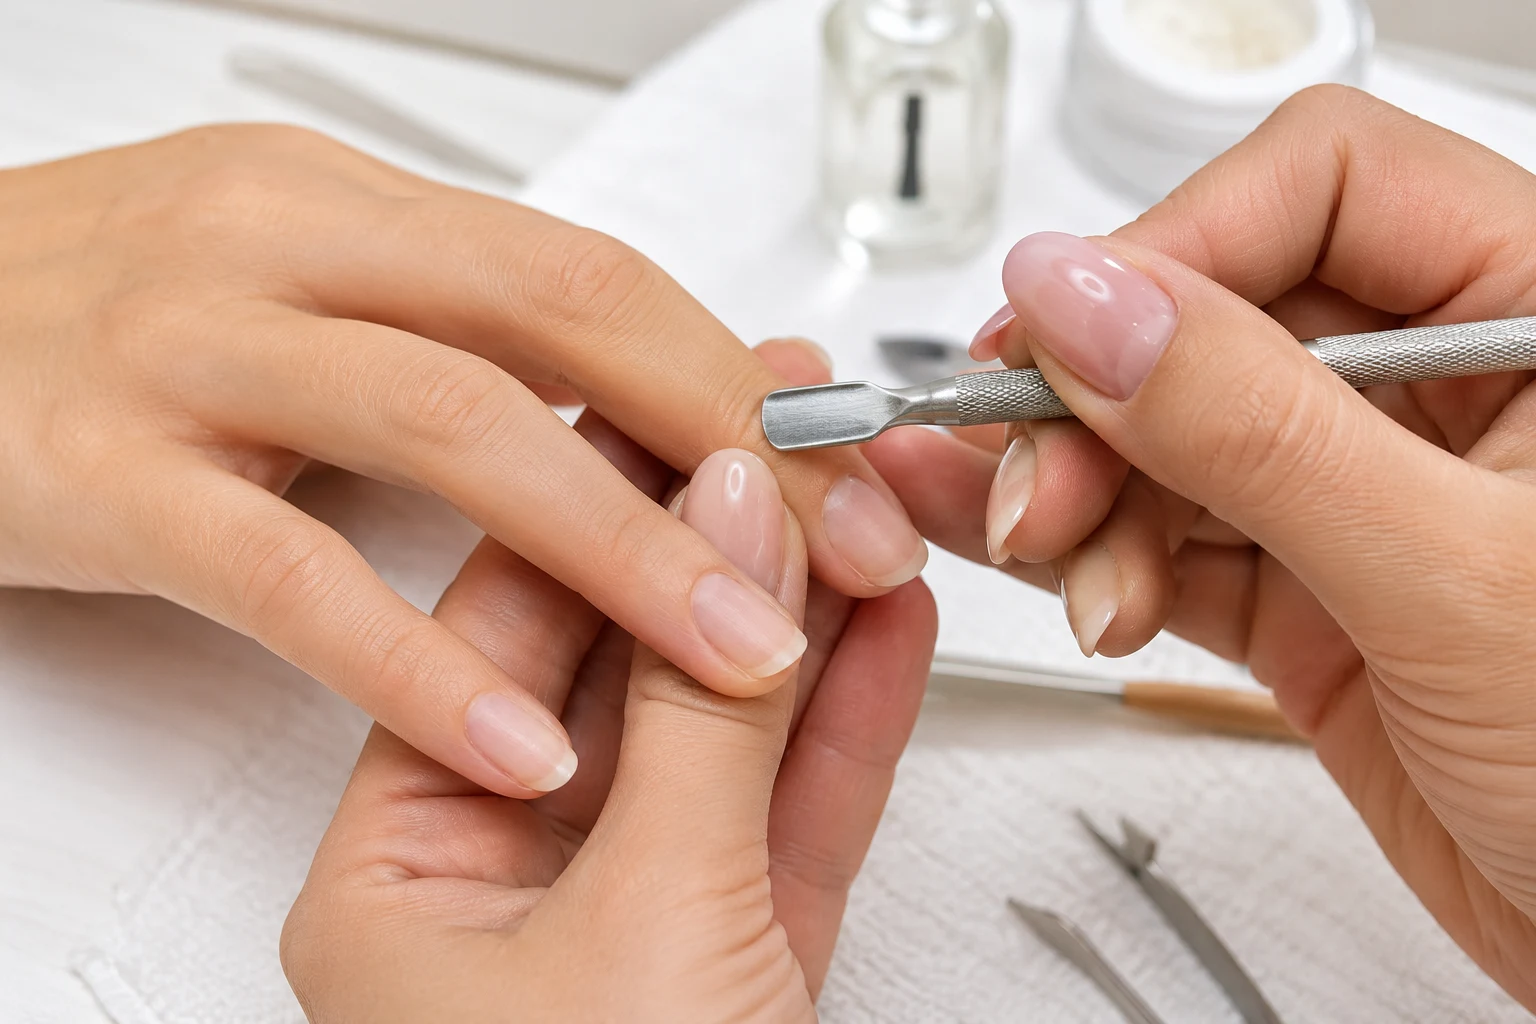
A proper fit is essential because oversized tips can lift, while tips that are too small may create pressure on the natural nail.
Before applying the extensions, lightly remove the shine from the inside of each nail tip.
This creates a textured surface that allows the gel to bond more securely.
Some nail artists use a buffer or sanding band for this step, while others prefer acetone with a cleanup brush to reduce dust.
Either method works as long as the inner surface is properly prepared.
Step 2: Apply the Gel X Extensions
Apply a thin layer of builder gel inside the portion of the tip that will contact your natural nail.
Starting near the cuticle, gently press the extension forward while avoiding air bubbles.
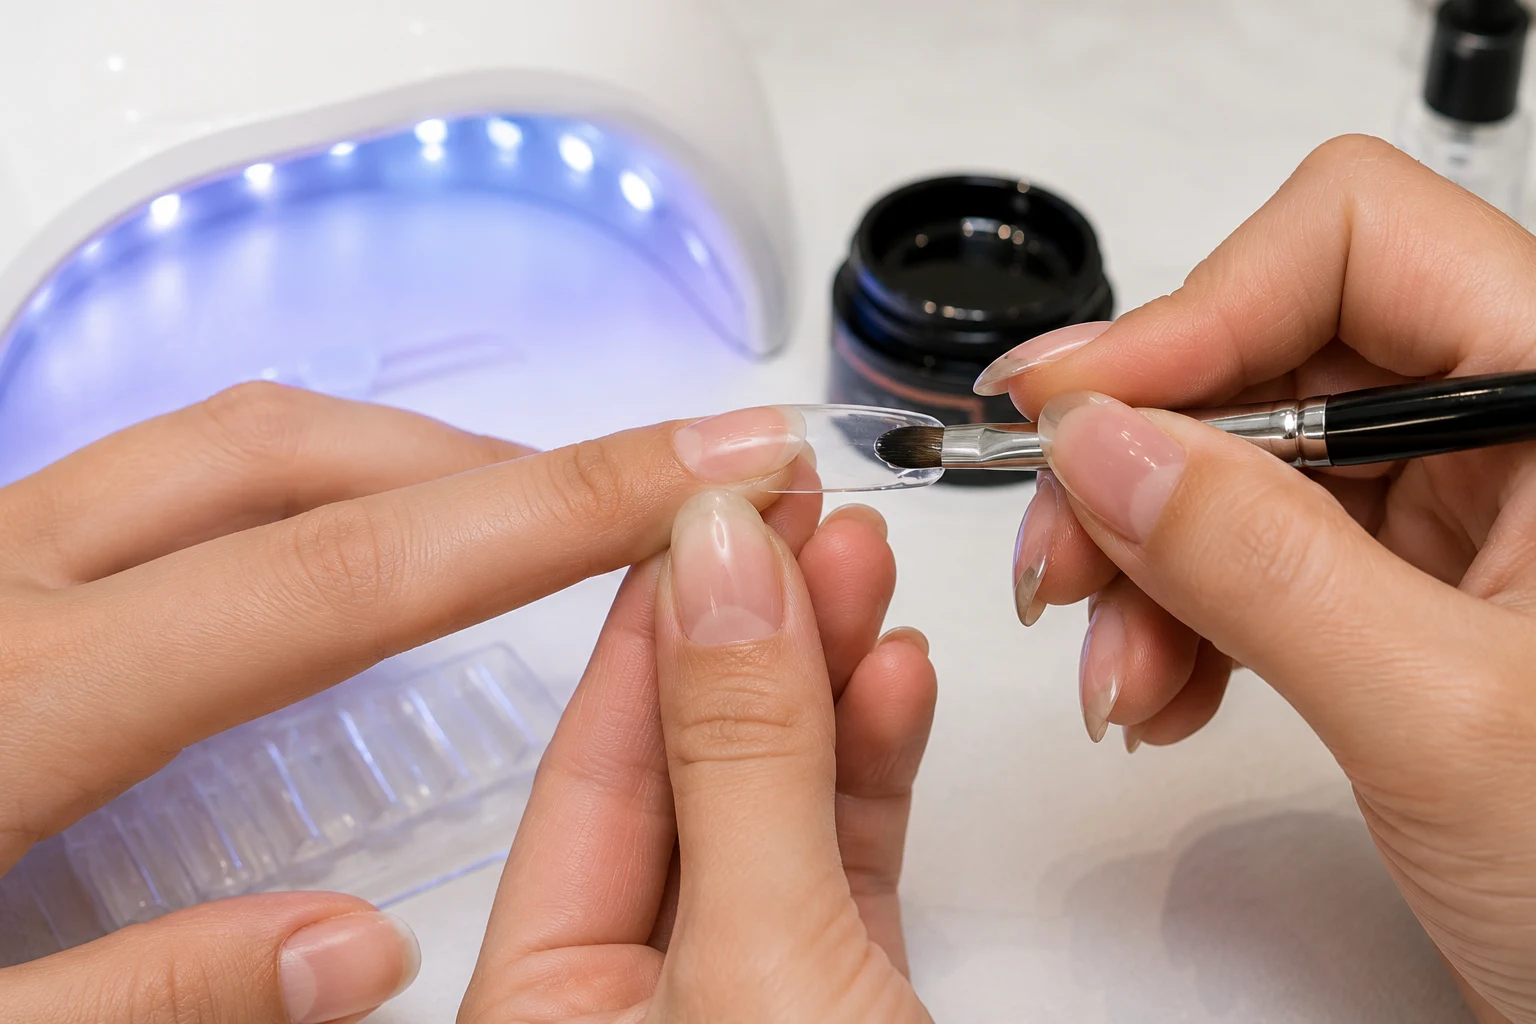
Once the placement looks straight and even, cure each nail under a UV or LED lamp according to your gel manufacturer’s instructions.
After curing, trim the extensions to your preferred length.
For this beach-inspired manicure, a medium-long almond shape creates the perfect balance between elegance and playful summer style.
Roughly shape each nail before moving on to the refining stage.
Step 3: Shape and Perfect the Nails
Now it’s time to refine the overall shape.
Use an 80/80 grit nail file to perfect the sidewalls, free edge, and almond silhouette.
Keeping the shape symmetrical will make the final nail art appear cleaner and more professional.
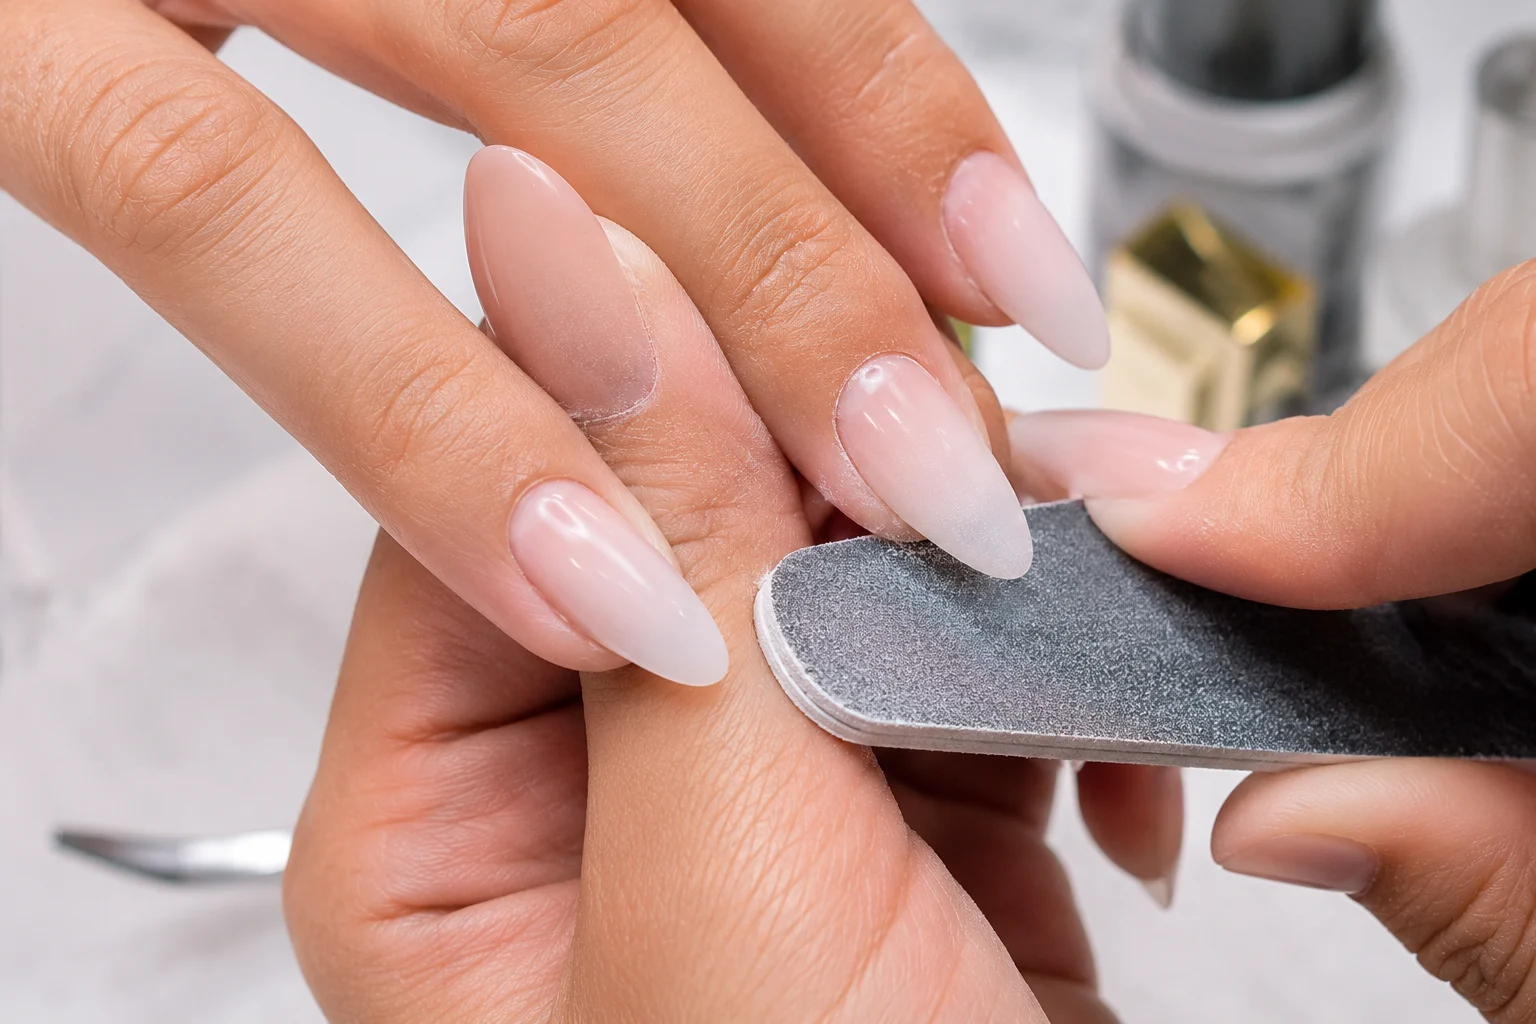
Next, use a medium-grit drill bit or your preferred e-file attachment to smooth the cuticle area and blend the extension seamlessly into the natural nail.
Finally, buff the entire surface to remove shine and smooth any imperfections.
A quick swipe of alcohol removes dust and leaves the nails perfectly clean for polish application.
With the prep complete, you’re ready to transform these simple Gel X extensions into stunning Beach Summer Nails using bright colors, tropical details, and eye-catching nail art.
Step 4: Apply the Base Colors
Now that the Gel X extensions are shaped and ready, it’s time to add the colors that bring this beach-inspired manicure to life.
Start with a soft nude base that complements your skin tone.
A warm sandy nude works beautifully because it reflects the natural colors of the beach.
Apply one thin coat first, then follow with two thin layers of a lighter nude to create a smooth, even finish with plenty of depth.
Allow each layer to cure completely before moving on to the next step.
Step 5: Create Bright French Tips
This summer nail design combines classic French tips with bold seasonal colors.
Choose a vibrant shade such as coral red, tropical orange, or bright pink for the French tips.
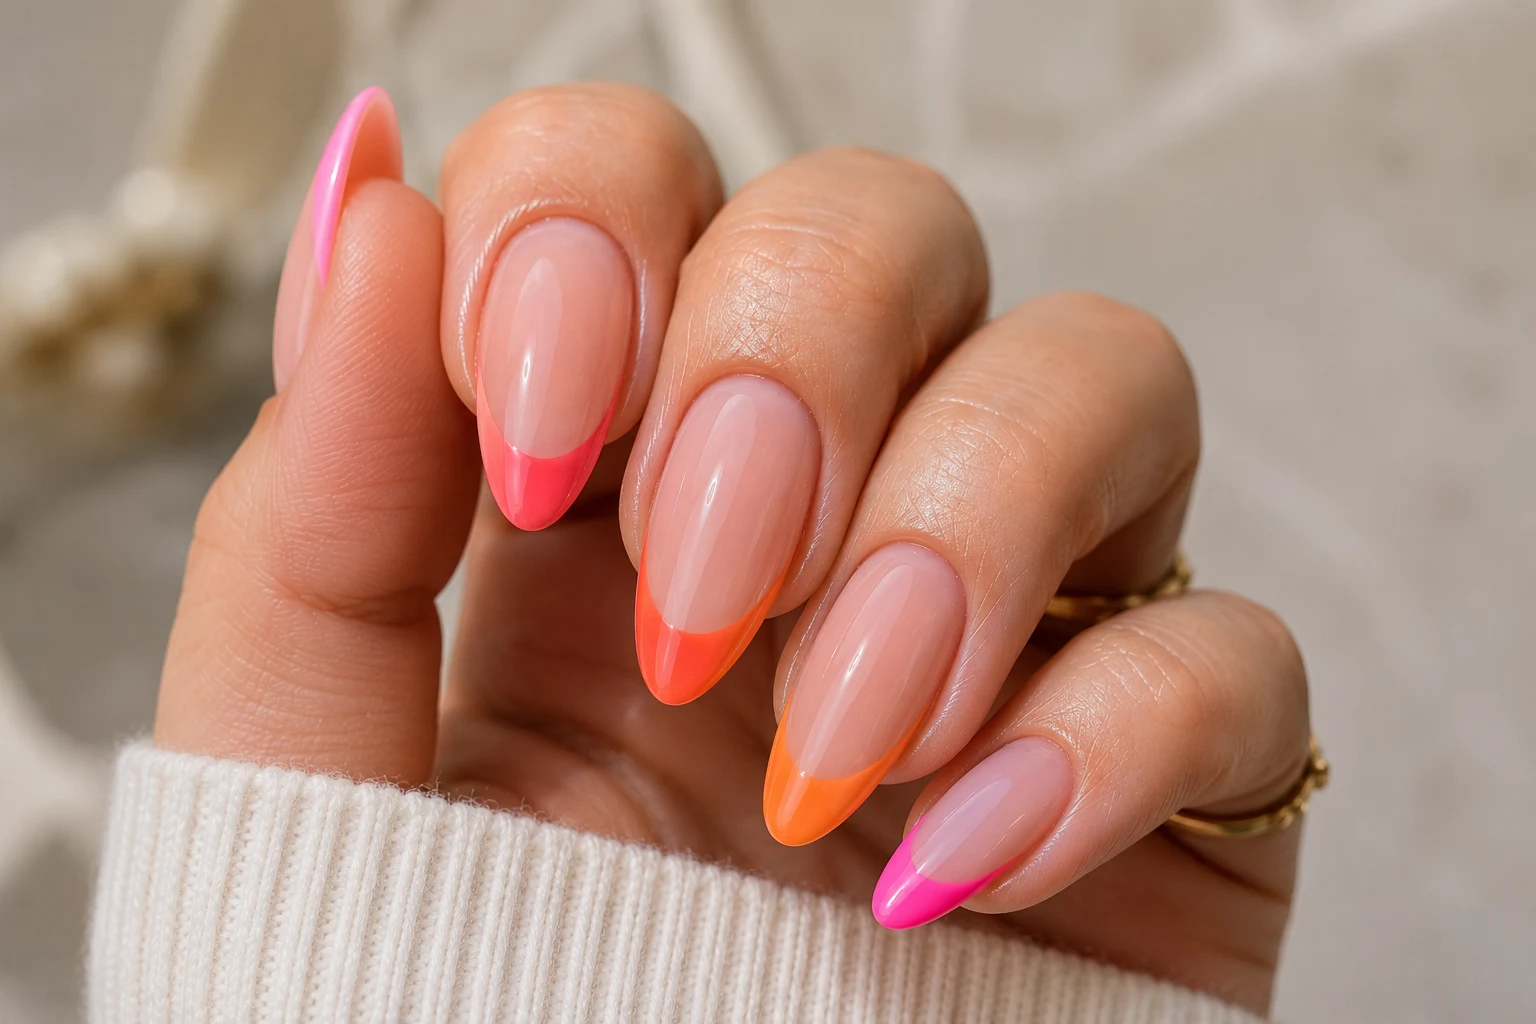
Paint the smile line slightly higher than your natural nail line to give the manicure a modern look without making it appear too dramatic.
For the cleanest results, always apply two thin coats instead of one thick layer.
Thin layers cure better, last longer, and keep the nail shape crisp without adding unnecessary bulk around the edges.
Step 6: Add a Soft Ocean Water Effect
One of the most eye-catching details in this manicure is the subtle water-inspired design.
Apply a sheer white gel over part of the French tip, then use a small dotting tool to place different-sized dots of clear base coat into the wet polish.
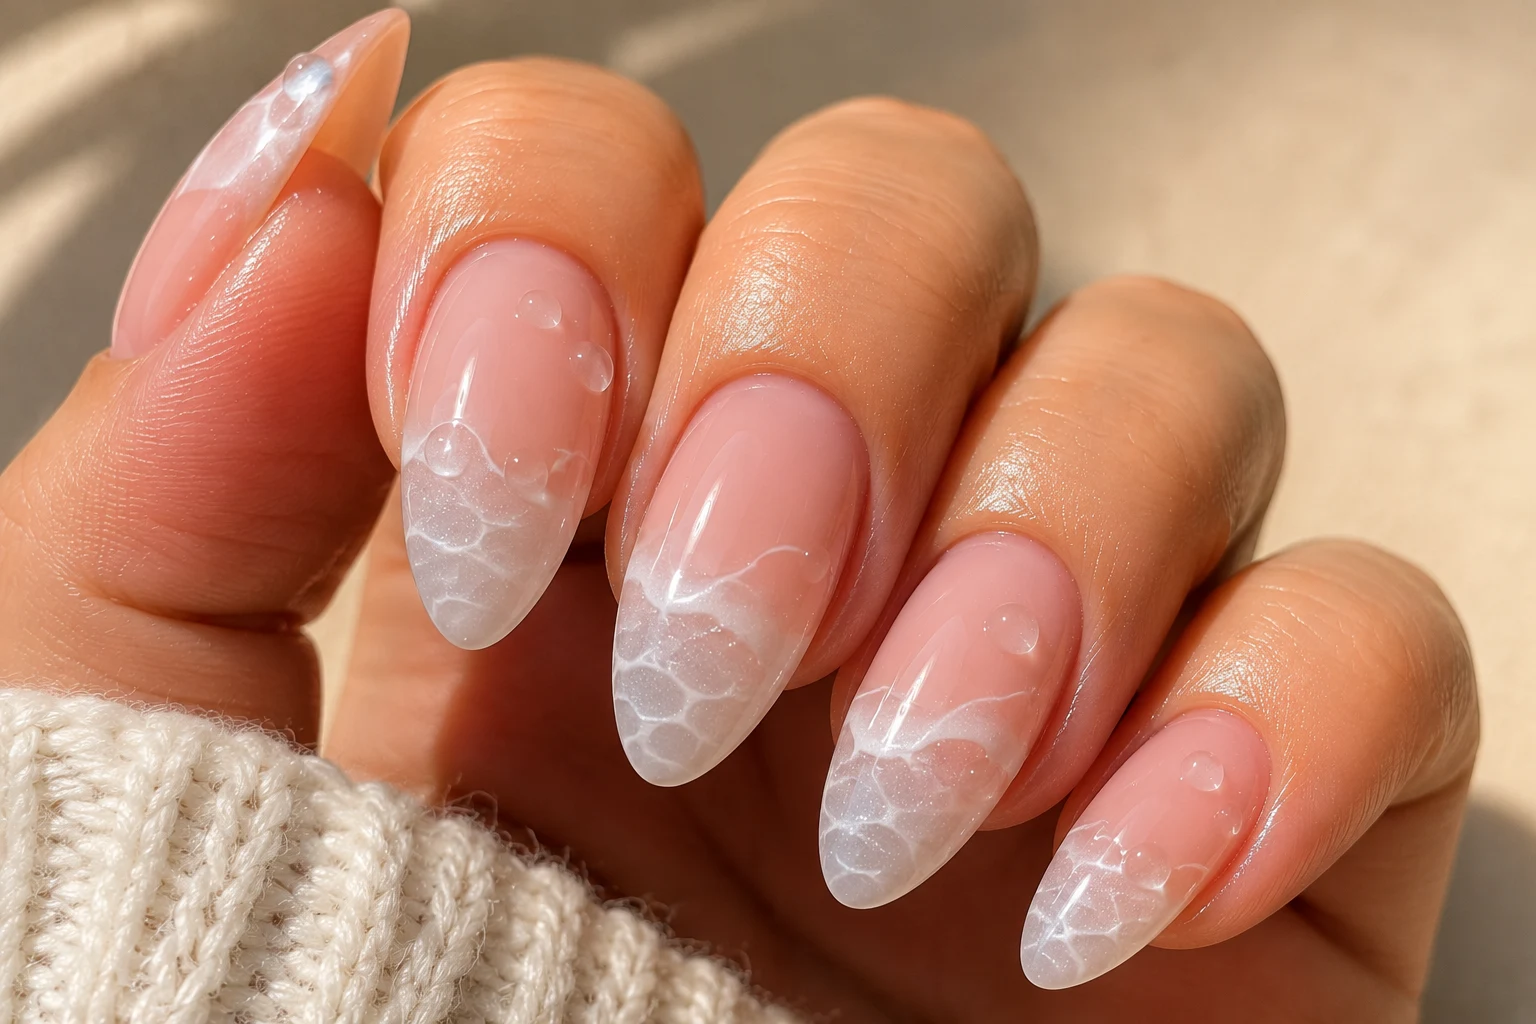
Before curing, gently tilt the nail in different directions.
This allows the gel to move naturally, creating soft wave-like patterns that resemble sunlight reflecting on ocean water.
Because no two waves look exactly alike, each nail will have its own unique finish.
Step 7: Blend Bright Summer Colors
To give the nails a fun vacation-inspired look, blend soft bursts of color across selected nails.
Use an airbrush machine or a makeup sponge to lightly apply shades like sunny yellow, coral, peach, and orange.
Instead of covering the entire nail, focus on creating gentle gradients that fade naturally into the nude base.
These colorful blends add warmth without overpowering the overall design and perfectly capture the relaxed feeling of summer by the beach.
Step 8: Paint Tropical Lemon Nail Art
Nothing says summer quite like fresh citrus details.
Start by sketching a circle, then divide it into several equal sections to form the inside of a lemon slice.
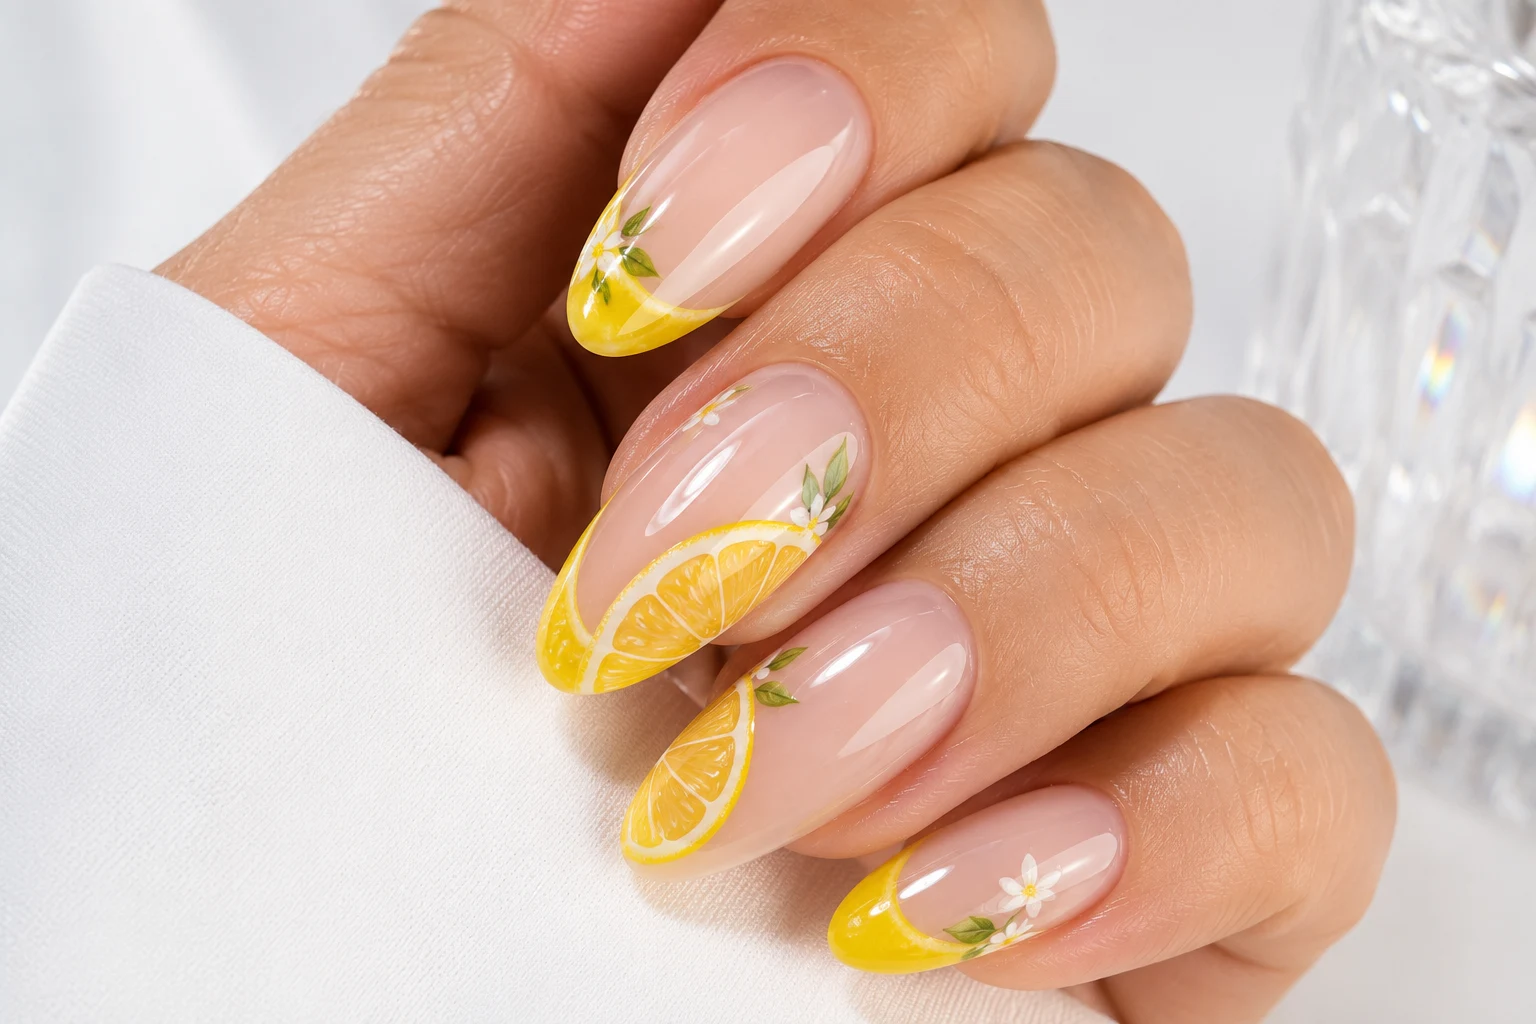
Round the edges slightly to keep the fruit looking natural before outlining the outer rind with a bright yellow gel polish.
A fine liner brush makes it easier to create clean sections while keeping the design realistic.
This playful accent instantly adds a cheerful, tropical touch to the manicure.
Step 9: Create a Raised Seashell Design
For extra texture, add a 3D seashell effect to one accent nail.
Using thick builder gel or rhinestone gel, draw several raised vertical lines that fan outward from the base of the nail.
Cure each section separately to prevent the gel from spreading.
Once complete, the shell catches the light beautifully and gives the manicure a luxurious beach-inspired finish without overwhelming the overall design.
Step 10: Sculpt Delicate 3D Flowers
Soft floral accents help balance the bright summer colors.
Using 3D sculpting gel, create individual petals one at a time. Press each petal gently into place before curing, leaving tiny spaces between them for a more realistic flower shape.
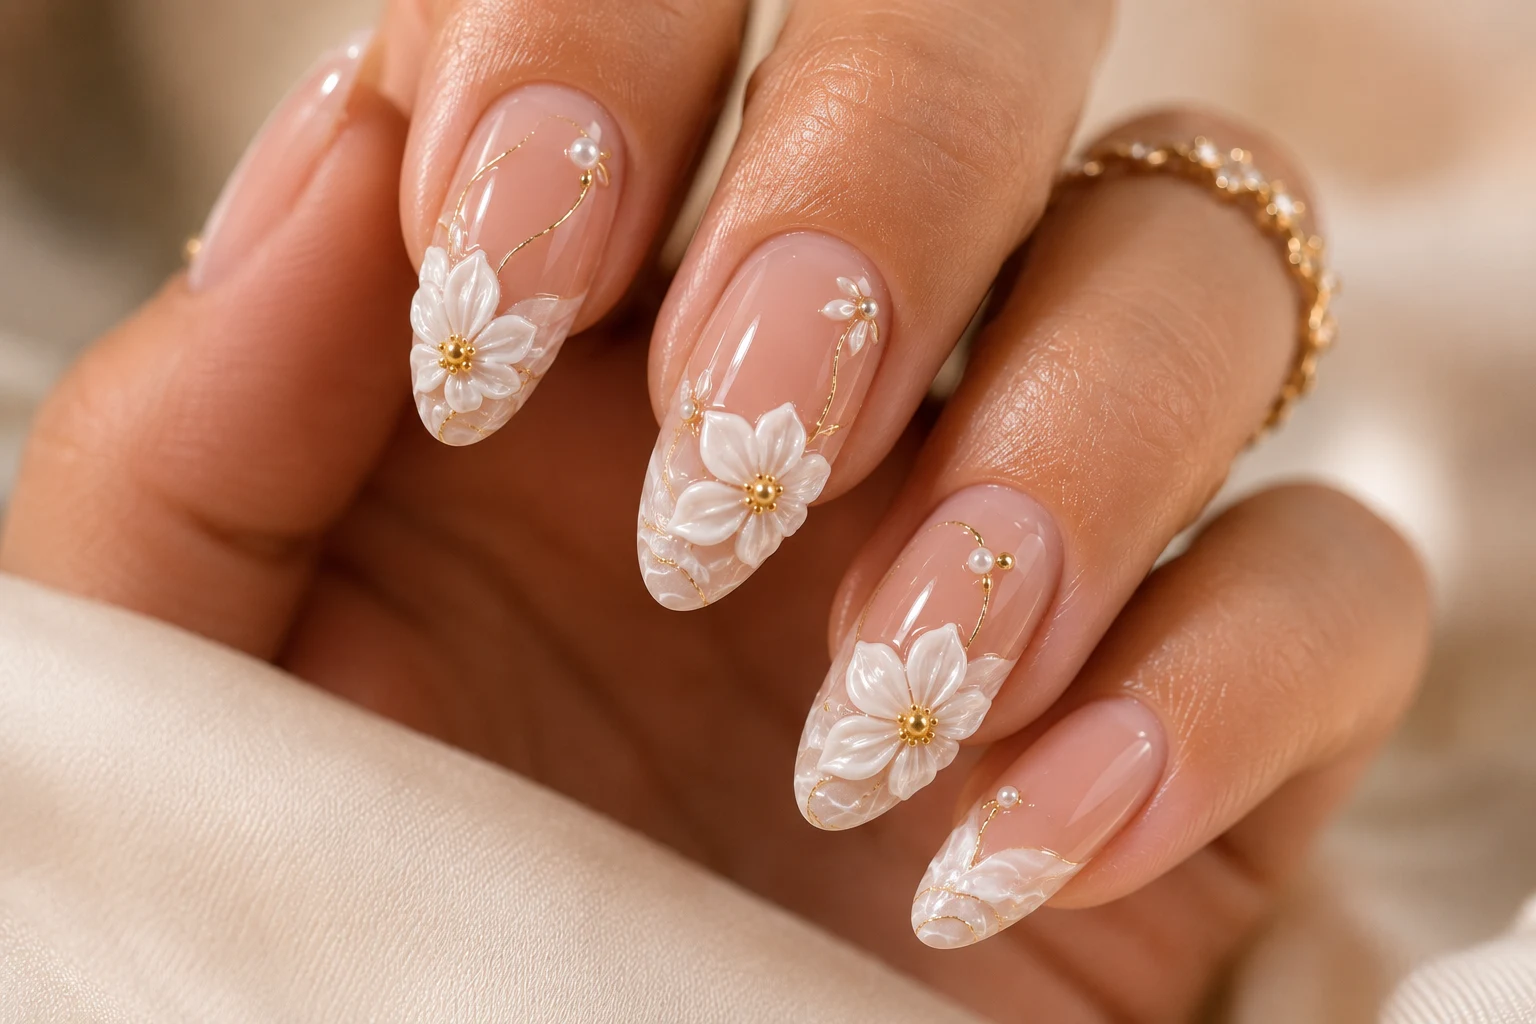
Finish the flowers with small centers in yellow or gold for a fresh, tropical appearance that perfectly complements the beach theme.
At this stage, your Beach Summer Nails already feature colorful French tips, flowing water effects, tropical lemons, textured seashells, and elegant 3D flowers—bringing together everything that makes a perfect summer manicure.
Step 11: Add Gold Accents and Decorative Details
The small finishing touches are what truly make these Beach Summer Nails stand out.
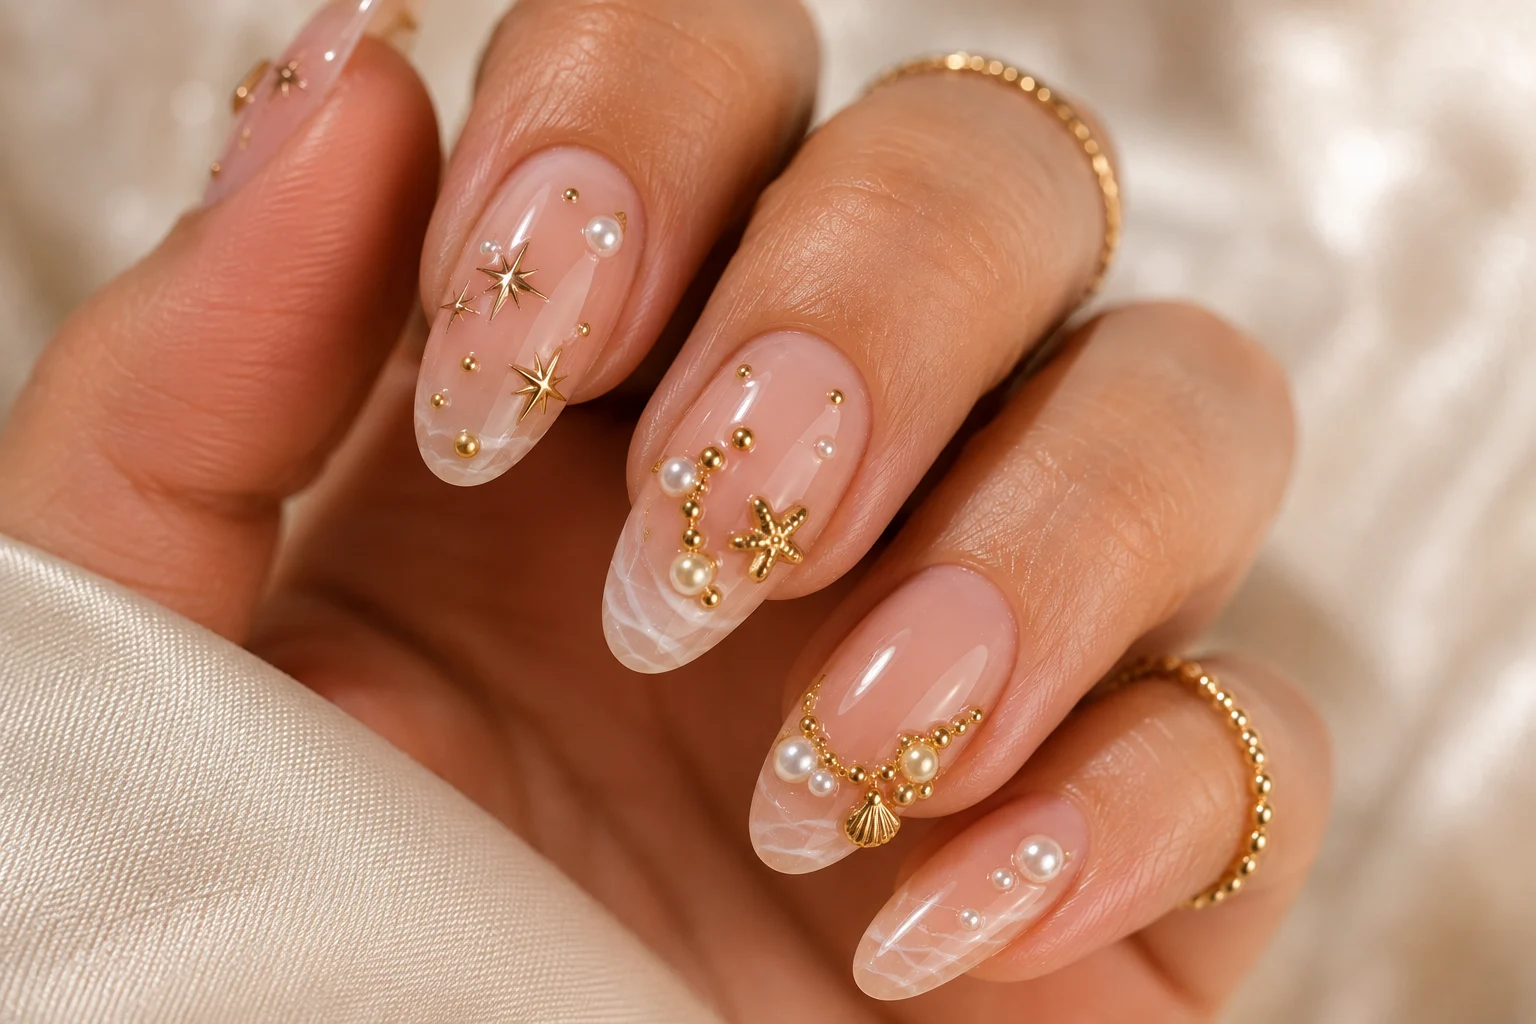
Using rhinestone gel, carefully place tiny gold beads, metallic charms, and a few pearl accents around the nail art.
Instead of decorating every nail heavily, focus on adding details only where they naturally enhance the design.
Gold embellishments complement the warm summer color palette, while pearls add a soft coastal feel that ties the entire manicure together.
Keeping the decorations balanced ensures the nails look elegant rather than overcrowded.
Step 12: Create Realistic Water Droplets
To give the manicure extra dimension, add glossy water droplets to selected nails.
Using thick clear gel, place droplets of different sizes over the design.
Cure each layer before adding another if you want larger droplets with a raised effect.
These crystal-clear accents resemble fresh water resting on the nails, creating a realistic beach-inspired finish that catches the light beautifully.
Although this step is optional, it instantly gives the manicure a more professional and luxurious appearance.
Step 13: Seal Everything with a Glossy Top Coat
Once every design element is complete, apply a high-quality glossy top coat over each nail.
Work carefully around the 3D flowers, shell texture, and decorative pieces so you don’t lose the definition of the artwork.
A thin, even layer helps maintain every detail while adding incredible shine.
After curing, inspect each nail from different angles to ensure the surface is smooth and every decoration is securely sealed.
Step 14: Nourish the Cuticles
The final step is simple but essential.
Massage nourishing cuticle oil around every nail to hydrate the surrounding skin and give the manicure a fresh salon-quality finish.
Healthy cuticles instantly make even the most detailed nail art look cleaner, brighter, and more polished.