
Classy Summer Nails
Before getting into this nail set, the nails needed a little bit of TLC.
Everything starts with sanitizing using a little bit of alcohol. Even after sterilizing and disinfecting, sanitization is still an important step because it adds an extra level of comfort and safety.
Softening And Pushing Back The Cuticles
After sanitizing, the next step is applying cuticle remover.
This helps soften the skin and makes the cuticles much easier to push back, especially if it has been a while since the last manicure.
Using a cuticle pusher, gently push back the cuticle and a little bit of the proximal nail fold.
Removing as much cuticle as possible at this stage makes the next steps quicker and more efficient.
Being gentle and careful is always the priority.
Cleaning Up The Excess Cuticle
Before clipping, lifting the proximal nail fold helps reveal what actually needs to be removed.
A gentle cuticle clean bit helps achieve this without damaging the nails and allows the process to be done at a higher speed.
Once everything is lifted, cuticle nippers are used to slowly remove the excess cuticle and a little bit of the proximal nail fold.
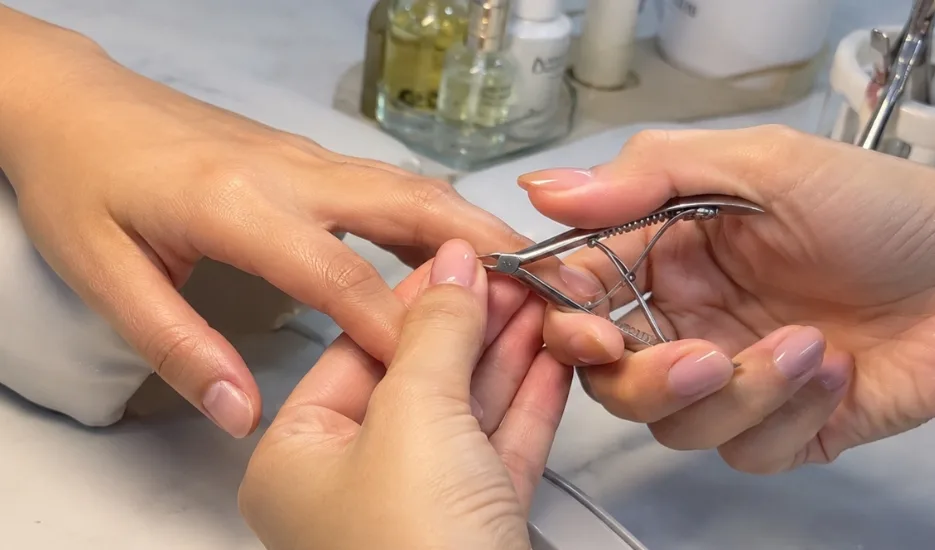
This step is mainly for aesthetics and should always be done carefully with clean and sterile nail tools.
Applying The Peel-Off Base Coat
Once the nail prep is complete, two layers of peel-off base coat are applied.
A small amount of cuticle oil underneath each layer helps make removal much less strenuous on the natural nails.
For this set, regular nail tips are used because acrylic extensions are making a comeback.
Each tip is sized from sidewall to sidewall, making sure it fits comfortably without squeezing the nail or overlapping the skin.
Instead of nail glue, base coat is used to secure the tips because it works better on a shiny and smooth surface.
After curing, the nail tips are cut down using tip cutters to create a shorter length.
Creating The Acrylic Extensions
The application uses Makartt Rose Petal acrylic paired with Young Nails monomer.
The entire process is done in about two to three beads because the nails are shorter and do not require too much product.
The most important thing is not the number of beads but the quality of the acrylic application.
Quality always comes before speed.
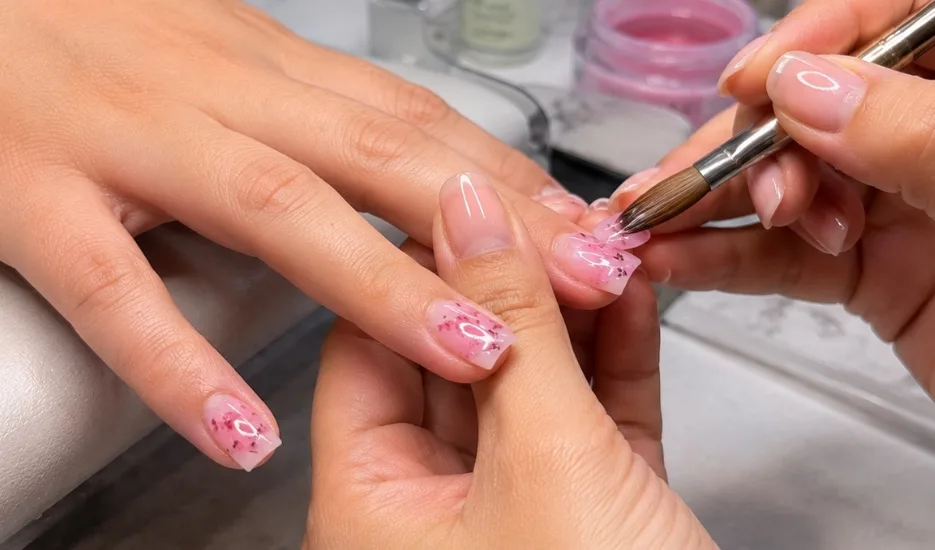
As skills improve over time, speed naturally follows, but focusing on clean and beautiful work should always come first.
Shaping And Filing The Nails
After the acrylic application is complete, shaping begins with an 80/80 grit nail file.
The sidewalls, undersides, free edge, and the main body of the nails are refined first.
A medium grit tornado bit is then used to correct the apex and seal the cuticles.
The final touch underneath the nails creates a thin and crisp C-curve.
Creating The Minimalist French Tip Design
The inspiration for this set is simple, classy, and subtle.
The design uses only three colors:
- Cream or eggshell white
- Black
- A floral color of choice
The French tips are kept basic without being too deep or V-cut.
Guidelines are created on all five nails before filling everything in with two thin layers for a crisp and square appearance.
Adding Animal Print Details
Black gel polish is used to create the leopard print and the zebra and tiger-inspired stripes.
The leopard pattern acts as a guide for placing the additional animal prints, creating a layered and overlapping effect.
Each nail includes slight variations while still keeping the entire set unified and balanced.
Creating The Blooming Gel Flowers
The floral details are made using blooming gel.
A thin layer of blooming gel is applied only to the desired area, followed by five dots of color to create the flowers.
The flowers add a subtle summer touch without overwhelming the minimalistic look.
Adding Gold Accents
Gold beads and gold pearls are added using rhinestone glue.
The decorations remain simple and elegant, complementing the overall minimalist theme rather than overpowering it.
After all the nail art is complete, a single layer of top coat is applied to seal the design and create a beautiful glossy finish.
The final step is always cuticle oil.
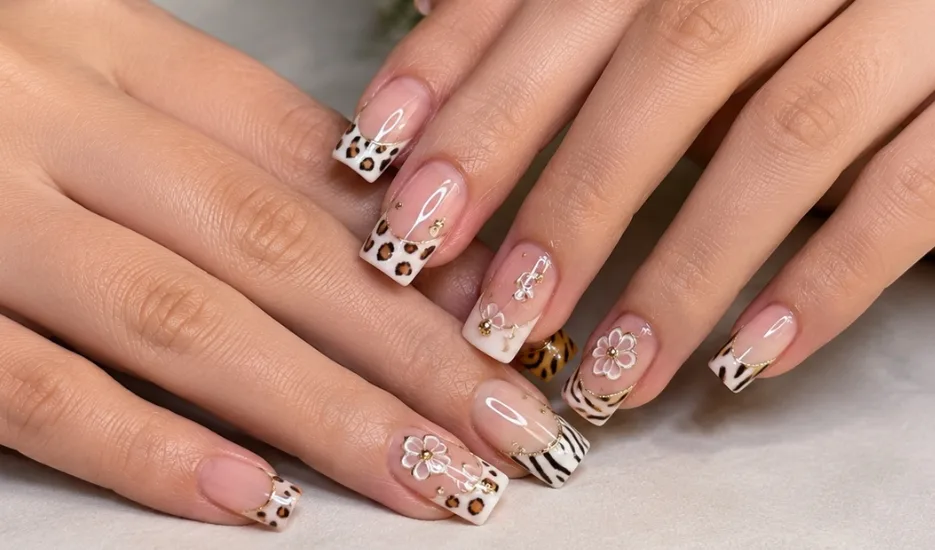
This helps nourish the nails and gives the entire manicure a healthy and polished appearance.
A Simple And Classy Summer Nail Set
This nail set proves that simple designs can still be incredibly beautiful.
The minimalist French tips, subtle animal print details, blooming gel flowers, and gold accents create a look that feels classy, elegant, and perfect for summer.
The design pairs easily with different outfits and offers a refreshing break from brighter and more colorful nail sets.